

This is what happens when I get bored. And also what happens when my parents try to change their granite.
Because what goes with golden oak cabinets?
No, really, if you know, tell me.
Because the moment my parents said they were going to upgrade their old countertops to expensive granite, I started panicking in my head, imagining some high-grade beautiful granite with their 16 year old gold oak cabinets that were installed when we first moved into that home in 2001. I imagined them trying to sell their home in 5 or 10 years, only to be turned away from potential buyers all because we decided to keep our golden oak cabinets… well, golden oak.
At the same time, they didn’t want to pay to get a whole kitchen makeover because changing the countertops after 16 years was a big enough deal already. And my parents… well, my dad, isn’t too keen on spending more money than he has to on something that is technically working. (Sigh).
So I had this amazing idea of DIYing a make-over for the kitchen, from seeing some DIY projects on Pinterest (go Pinterest!). Seriously though, for some reason, Google is great with the quantity of results, if you really love going from page to page to page… but if you really want quality results for your searches, Pinterest is the way to go. The blog I was inspired by and gave me the courage to even TRY to attempt this was http://www.designertrapped.com, a blog managed by a woman named Tasha (here is her DIY Makeover) who made it seem like you really can do anything with a little bit of effort! Anyways, I figured, if she can do it, why can’t we, right?
So after some convincing (my parents never knew that you could just paint cabinets – I mean, the idea literally baffled them), we decided that we would go ahead and try the upgrade ourselves, and if all else fails, we would just buy a new house. Just kidding.
So I got to work. I unscrewed all the cabinets, and I made sure to number everything. I went across the top first numbering, then I did the whole bottom row, and lastly the island. We debated for awhile between using a dark glaze or white cabinets, but my mom was afraid of how the dark cabinets would look, and knowing that white cabinets would open up our kitchen a bit more and also give us more options in granite selection, we went with the latter.
We had decided that we wouldn’t buy new hardware but instead would spray paint all of them, instead of keeping them gold – obviously – so I took the screws and dumped them in hot water and soap, letting them soak for at least 30 minutes, and I scrubbed them with rough side of my mom’s scouring sponge (sorry, mom). The reason for this is that although the sealant on most of the hardware had worn off, some of them still had it, which means that I wouldn’t be able to spray paint it without it scratching off eventually.
Once I unscrewed everything, I took an old towel and poured Rust-Oleum Deglosser on the towel (make sure to wear gloves when doing this), and in circular motions, I cleaned all the grease and dirt off the cabinets, which would make it easier for the paint to adhere to them without worrying about chipping. The Rust-Oleum Deglosser works like a sander, except the difference is that it is liquid, and it is SO much faster than the original way of sanding! I noticed the cabinets were a little bit lighter and rougher, so I knew that they were ready to be painted.
We were originally going to go ahead and paint the cabinets without priming using General Finishes Milk Paint in antique white, as I have read really great reviews about it. Supposedly you can paint the cabinets with just one coat of it which would have been ideal considering 1 gallon is $90 on Amazon, but that definitely wasn’t the case for us. After one coat of the paint on one of the insides of the cabinet doors, you could still see the wood underneath, and after two coats, it still wasn’t perfect. So we opted instead to buy Rust-Oleum Zinsser Primer, which was only $20 for a gallon. We went over all the cabinets with two layers of primer, and this is how it looked.
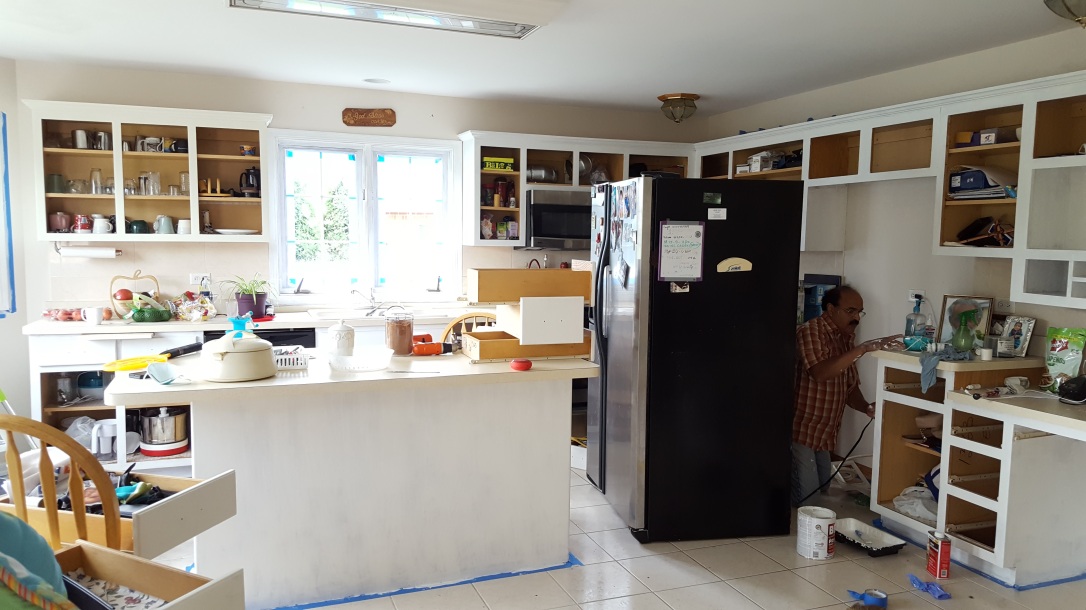
That is the hired help behind the fridge. Just kidding, that’s my dad.
But as you can see, two layers really made a difference, and it ended up saving us a lot of time (and paint) when it came time to painting it with the General Finishes paint. We worked on that and also painting the hardware simultaneously, so as the cabinets dried, we could hang up the doors. The painting and spray painting were all done in the garage, laid on a wood plank on the ground over plastic sheets as to not stink up the house and to make it easier to do the work.
To paint the cabinets, I used a foam roller and also foam brushes to avoid leaving paint strokes since the paint is pretty thick. I used the roller for all the bigger areas of the cabinet and the brushes to get into the cracks. The spray paint we used was Valspar Brushed Nickel, which gave it a really nice matte silver finish, and once the paint dried, we used Valspar Clear Gloss Enamel as the protective coating. The finishing used to protect the cabinets 1) from yellowing 2) from chipping away and 3) to make it easier to clean was General Finishes Water Based High Performance Polyurethane Top Coat Satin. I recommend doing 2-3 coats of the top coat as it will give your cabinets the best protection.
These are the results:
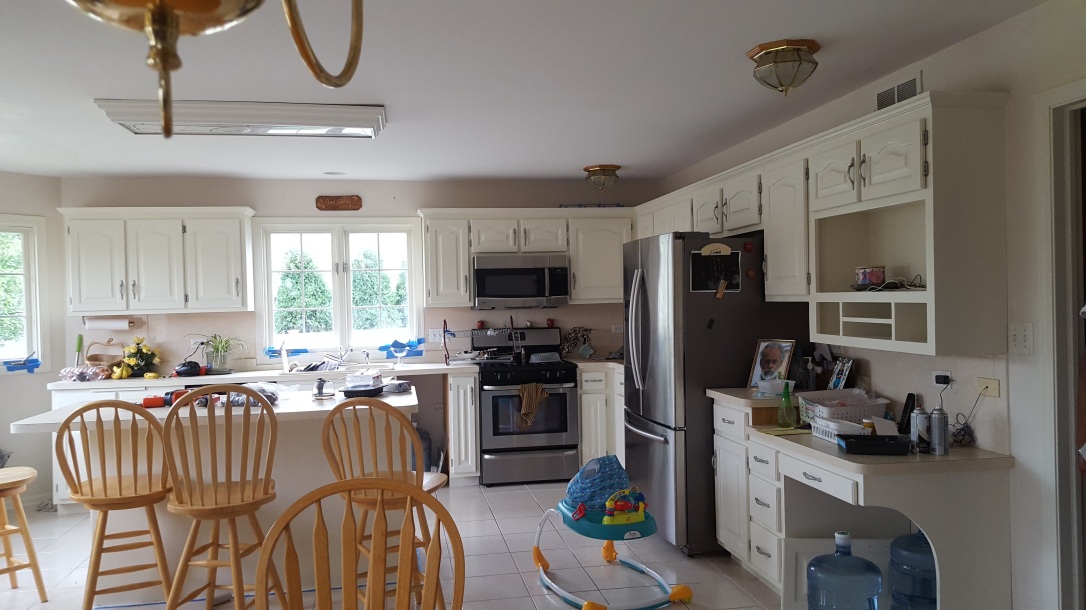
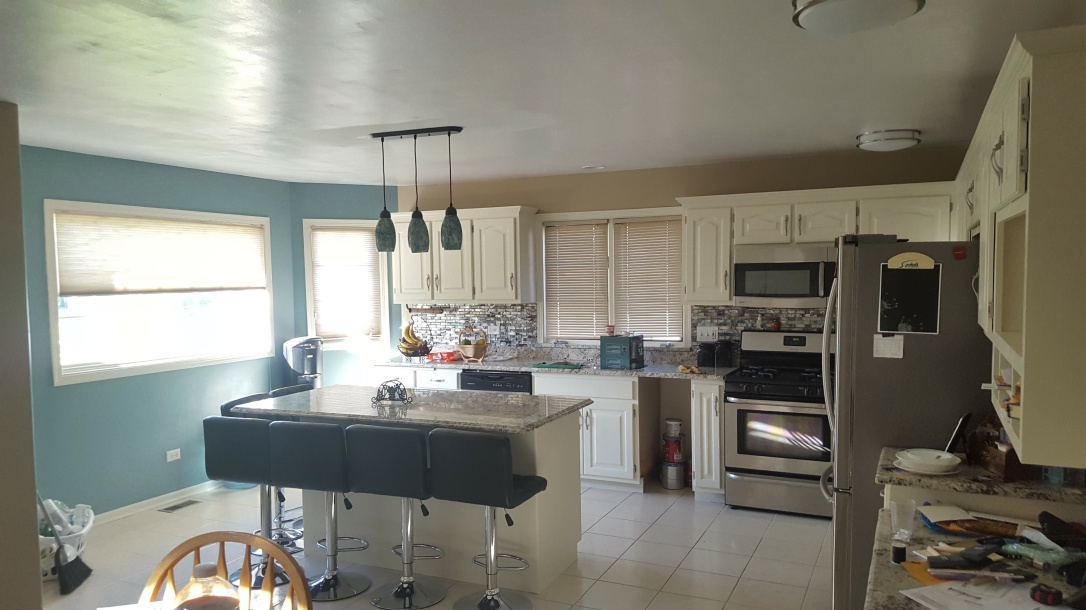
What a difference right? Well, once that was done is when we really noticed a more things that we needed to change other than just the granite – the wooden spinning bar stools, the backsplash which now looked like a very pale pink, the light fixtures, and definitely the color of the walls.
We went ahead with Alaskan White granite,


which turned out to be so beautiful, and we replaced those ugly gold oak stools with these Stockholm Adjustable Height Swivel Bar Stools from Wayfair which were only $43 per bar stool on sale when we bought them, and we bought 6 pieces to put at our island.
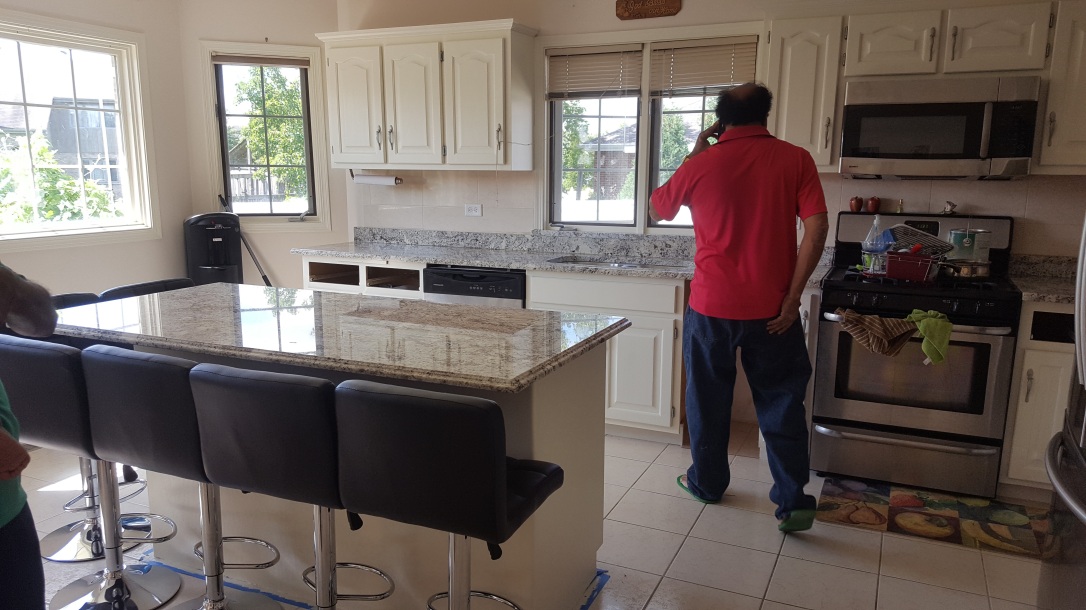
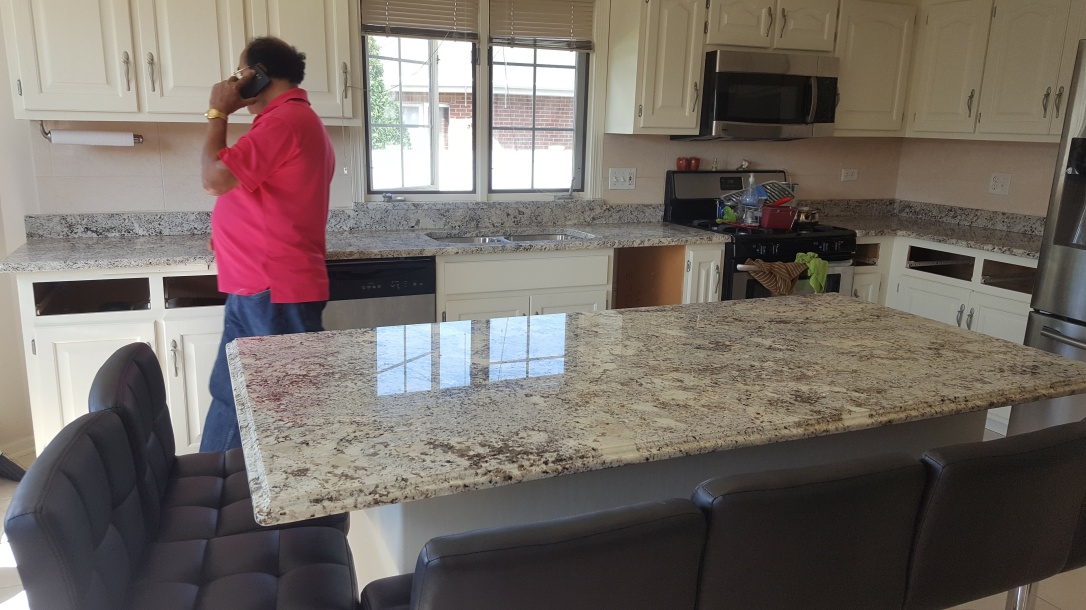
I love how they can be lined up next to each other, which actually increases the number of people who can sit there, and I have to say it is one of the most comfortable stools to sit on. Now, as you can see, the backsplash now looks like a weird light pink color, and we knew that it had to be replaced. And if you want a close look at the old backsplash, here it is:
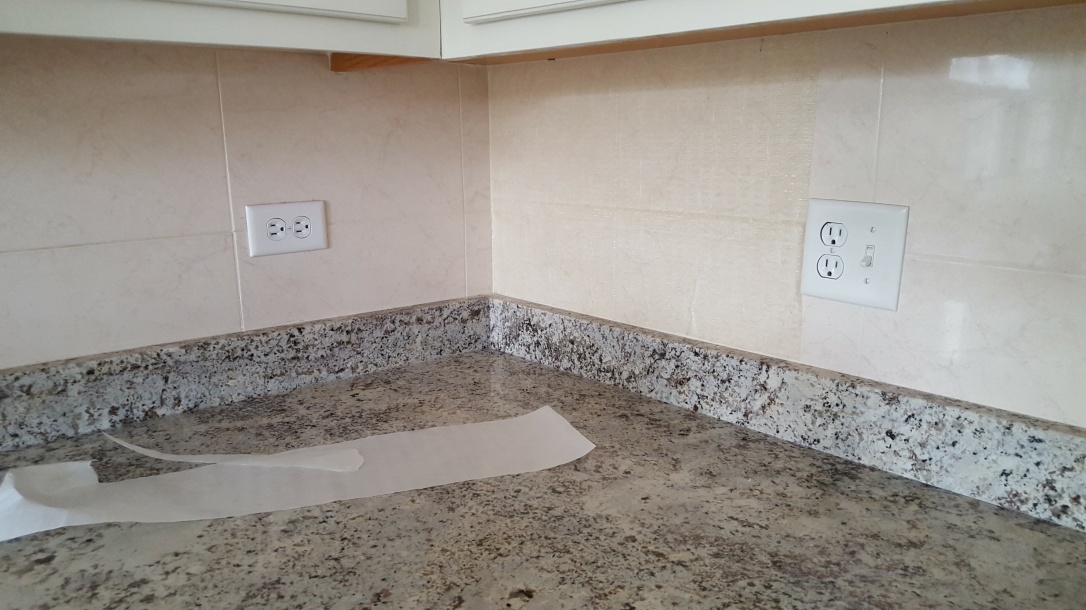
See? Not that pretty.
Finding the right backsplash was a little difficult, but I’m sure it was easier than it was maybe ten years ago. The reason I say it was difficult was that we were not trying to remove and replace the current backsplash, but instead find something we could lay over it, which means less money and less work which meant less time put into the project. We ended up going with Oceano Linear Mosaic Glass Tiles, which are seriously the most beautiful tiles I’ve seen! Since we cut costs everywhere else, we figured we would splurge a little on this backsplash, and at the time we bought them, they were only about $13 per square foot.
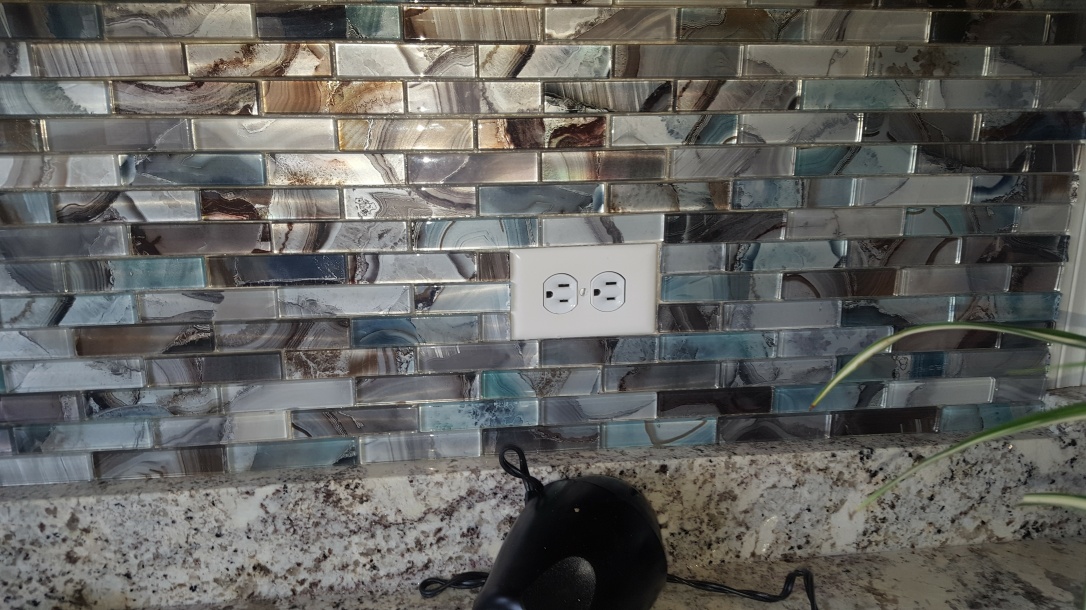
To put in the tile, we bought a MusselBound 15-sq ft White Plastic Commercial/Residential Tile Membrane which is a double-sided adhesive, perfect for laying tile over existing tile. We used scissors to cut the sheet into the proper sizes and laid it on the existing tile, peeled off the protective layer and started “stacking” the tiles, using a QEP Glass Tile Nipper, to cut the edges of the tile so they would all line up. After that, we grouted in all the spaces between the tiles, which was super easy to do. All we did was spread grout all over the tile, making sure it filled in the spaces, and then we wiped the tile clean with a wet rag, squeezing out excess grout water into a bucket in-between. The results are beautiful and have really played a huge role in transforming our kitchen!
We replaced all the light fixtures with ones from Home Depot. The two wood and gold metal framed lights we replaced with Saturn 2-Light Brushed Nickel Flushmount, and the island lighting we replaced with Patriot Lighting® Mix and Match Oil-Rubbed Bronze 3-Light Mini Pendant and the glass we customized our light fixture with was Patriot Lighting® Blue/Amber Oval Replacement Glass. We went this route instead of getting three separate pendant lights because we only had one hole in the ceiling and didn’t want to put in that extra work of adding wires and holes and all that, and we are very much happy with the results.
Finally, we painted the walls. Having a hard time picking what colors we wanted, we picked out a few colors from the backsplash and granite, and narrowed down to two choices – we figured we would have an accent wall on the wall with with three windows in the kitchen. We chose the color Bali Bliss from Behr for the accent wall, and for the main walls, we picked Sahara Desert Sand.
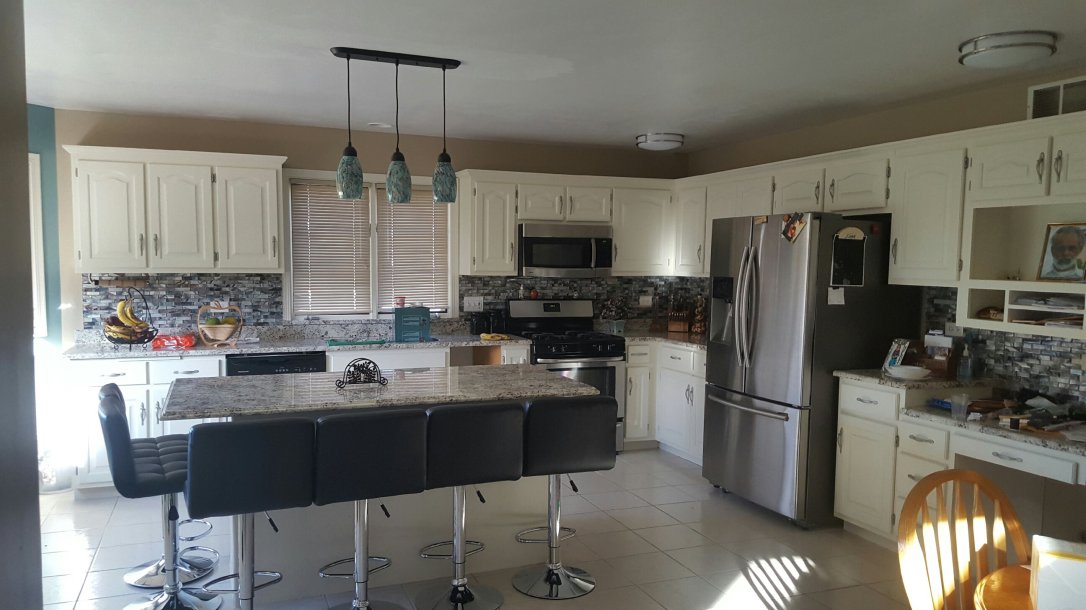
Well. There you have it! From end to finish, our whole kitchen make-over! Here are the cost breakdowns for a total of $1104 for everything except the granite, and with the granite included, it cost us a grand total of $4604! Without the granite and backsplash, it would have been only about $670, and for a kitchen this size, I would say that we did a pretty good job!
- Rust-Oleum Deglosser – $13
- General Finishes Milk Paint in antique white – $90
- Rust-Oleum Zinsser Primer – $20
- Valspar Brushed Nickel – $18
- Valspar Clear Gloss Enamel – $9
- General Finishes Water Based High Performance Polyurethane Top Coat Satin – $90
- Stockholm Adjustable Height Swivel Bar Stools – $258
- Oceano Linear Mosaic Glass Tiles – $435
- MusselBound 15-sq ft White Plastic Commercial/Residential Tile Membrane – $50 for 2
- QEP Glass Tile Nipper – $13
- Saturn 2-Light Brushed Nickel Flushmount – $52 for 2
- Patriot Lighting® Mix and Match Oil-Rubbed Bronze 3-Light Mini Pendant – $20
- Patriot Lighting® Blue/Amber Oval Replacement Glass – $36 for 3
- Granite was $3500, the one thing we couldn’t do by ourselves and had to pay the most for obviously.
*Painting Tip – Instead of taping all the edges, window frames, etc., we learned from a recent project that a Paint Guard works MUCH better and is SO much easier than taping everything – it will literally save you a few hours work, especially on big projects.
*Painting Tip – Soak brushes used to paint on primer in gasoline, and it will wash right off. Regular paint can be washed off with soap and water.
For those of you who are afraid or have never done a DIY kitchen make-over, I recommend it for the amount of money you save and also all that you learn! This project took us a month since we were only working on it part time, but it was definitely worth it!

